Before you begin
Required software
Make sure you have Python 3.11 or later installed on your system. To check your current Python version, open a terminal and run:Windows
Windows
To install a newer version of Python on Windows, download the installer from the official Python website and run the setup. During installation, enable the option to Add PYTHONPATH to the environment variables. This step ensures you can use the latest Python version directly from your terminal.The installer also includes the pip package manager, so you don’t need to install it separately.As an alternative, use a Python version manager like uv or pyenv to install and manage multiple Python versions on your system.
Linux
Linux
Most Linux distributions include Python by default. If your version is older than 3.11, check your distribution’s package repositories for newer versions:If your distribution does not include newer packages, you can use pyenv or uv to install a newer version of Python:
uv
uv
-
Install uv with the following command:
-
Verify that uv is installed:
-
Install Python 3.11 with the following command:
-
And verify that Python 3.11 is installed:
-
Close your terminal and open it again to reload the
PATHenvironment variable. Then run the following command to check your current Python version:
pyenv
pyenv
- Install all of the distribution’s dependencies before you install pyenv.
-
Install pyenv:
-
Add this to your
~/.bashrc: -
Run this code to add
pyenvto your~/.profile. If you don’t have a~/.profile, create one:If you have a~/.bash_profileinstead, you must run the following code to addpyenvto your.bash_profilefile:If you don’t usebash, check out alternative setups in the pyenv documentation. -
Restart your shell:
-
Check if pyenv was successfully installed:
-
Install Python 3.11 and make it the global version:
macOS
macOS
Python usually comes pre-installed on macOS. If your version is older than 3.11, install a newer version using Homebrew.To install Homebrew, run the following command:And then install Python by running:This installation also comes with the pip package manager, so you don’t have to install it yourself.Alternatively, you can use a Python version manager such as uv or pyenv to install different Python versions in your system.
watsonx Orchestrate account
- To use the ADK, you must connect it to an existing watsonx Orchestrate environment. If you don’t have a watsonx Orchestrate account, you can sign up for a free 30-day trial.
- If you already have a watsonx Orchestrate account, you can use your existing account to provide an environment to use with the ADK.
Setting up and installing the ADK
Installing the ADK
Use the following command to install the ADK with pip:You can optionally use a virtual environment (venv) or a version manager like uv to control the packages you install. This setup makes it easier to share and distribute your agents and tools with others.To learn how to install the ADK in these situations, see the following steps:
BASH
- System installation
- Virtual environments
- uv
Install the ADK on your system with the following command:
Configure your environment in the ADK
Configure your watsonx Orchestrate environment in the ADK. Use this environment to create your agents.In this step, you need access to specific credentials for your environment. If you don’t know the type of environment you have, see Logging in to IBM watsonx Orchestrate.
To add your environment, run the following.
IBM Cloud
IBM Cloud
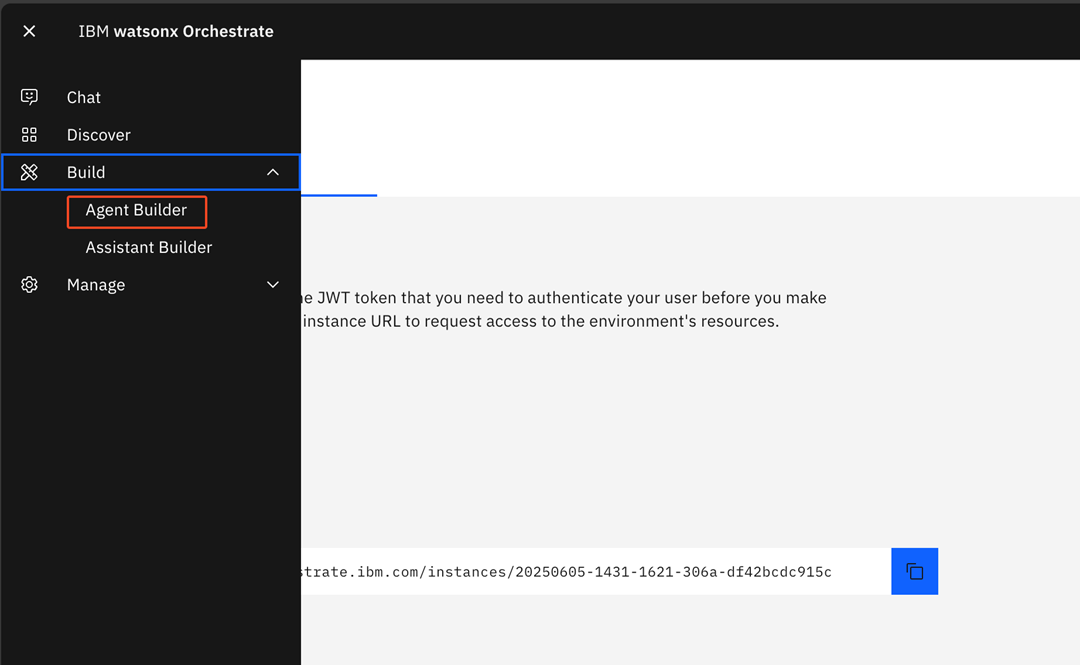
To connect to IBM Cloud, you need both the service instance URL and an API key of your watsonx Orchestrate instance.
Don’t use the credentials that you get from the IBM Cloud resources page. Use the following procedure to get the appropriate API key and service instance URL.


Generate an API Key
The page redirects you to the IBM Cloud Identity Access Management center. Click Create to create a new API Key.


Add and activate your environment with the ADK CLI:For more information, see Configuring your environments.
BASH
Note:You can set any name you prefer for the environment.
AWS
AWS
To connect to an instance hosted on AWS, follow these steps:

Click the Generate API key button and copy the key.
- API keys are not retrievable and can’t be edited or deleted. Make sure to store your API keys in a safe location after you generate a new API key.
- You are limited to 10 API keys in this environment. If you have no more available keys, contact IBM Support for further assistance.
Add and activate your environment with the ADK CLI:For more information, see Configuring your environments.
BASH
Note:You can set any name you prefer for the environment.
On-premises
On-premises
For on-premises environments, you can authenticate using one of two methods:
- API Key Use the API key that authenticates your user in the on-premises watsonx Orchestrate environment.
- Username and Password Use your username and password credentials to authenticate in the on-premises watsonx Orchestrate environment.
Note:
You can only use one authentication method at a time. If you try to authenticate using both methods simultaneously, an authentication error occurs.
BASH
Note:You can set any name you prefer for the environment.In the rare case when the watsonx Orchestrate ADK does not automatically infer the correct authentication type for
your url please add the following to the
orchestrate env add command:- IBM Cloud:
--type ibm_iam - AWS:
--type mcsp - On-premises:
--type cpd
Activate your environment
Run the following command to activate the environment you created:
If you need to change your environment, see Configuring your environments.
Environments on AWS GovCloud
Environments on AWS GovCloud
For FedRAMP-compliant environments on AWS GovCloud, use the following script to activate your environment:And run it as follows:
fedramp_activate
BASH
Note:
You can also activate a local development environment. This environment is provided by the watsonx Orchestrate Developer Edition, a stripped-down version of watsonx Orchestrate that runs under a Docker container to be used as a development server. To learn more about it, see watsonx Orchestrate Developer Edition.
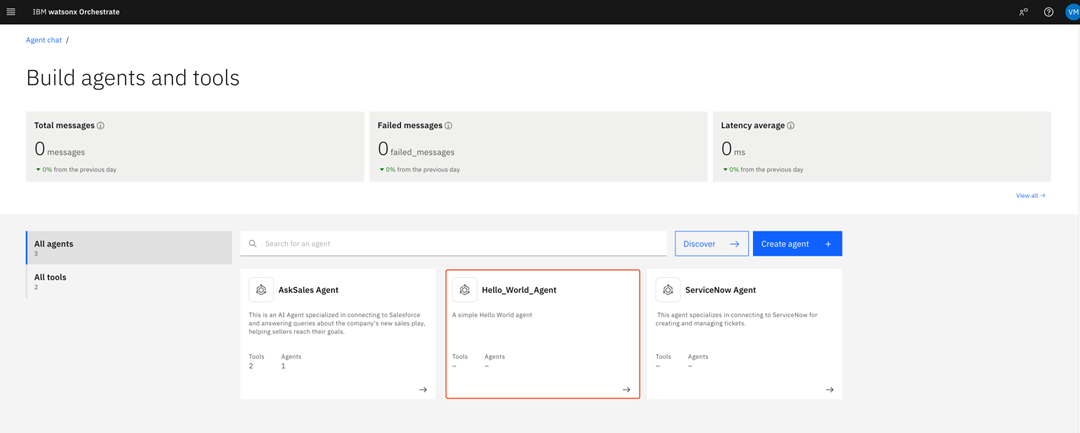
Creating your first agent
With your ADK connected to your watsonx Orchestrate instance, you’re ready to test your setup by publishing a simple agent. In watsonx Orchestrate, you define agents using YAML or JSON files. The agent specification file includes key details like the agent’s name, kind, instructions for the LLM, and the tools it can use. When you build agents with the ADK, you write this specification yourself. This approach gives you full control over your agent’s behavior and capabilities. You can create advanced agents with custom tools, collaborators, or integrations. For now, start with a minimal Hello World agent to verify your setup.For internal GovCloud environments (staging, pre-prod), specify the IAM URL:
./fedramp_activate fedramp --api-key <your_api_key> --iam-url dai.prep.ibmforusgov.comStarting your ADK project
As a Python project, it’s a good practice to create a folder that stores your agents, tools, and other resources.Example of folder structure:
Creating the agent specification
Start by creating the YAML file for the agent and name the file as And save the file in the
hello-world-agent.yaml. Open the created file with the text editor of your choice, then copy and paste the following code.hello-world-agent.yaml
agents folder.Import the agent
Open your terminal and navigate to the folder where you created the YAML file. Then run the following command to publish your agent:If the import is successful, you get the following confirmation message:
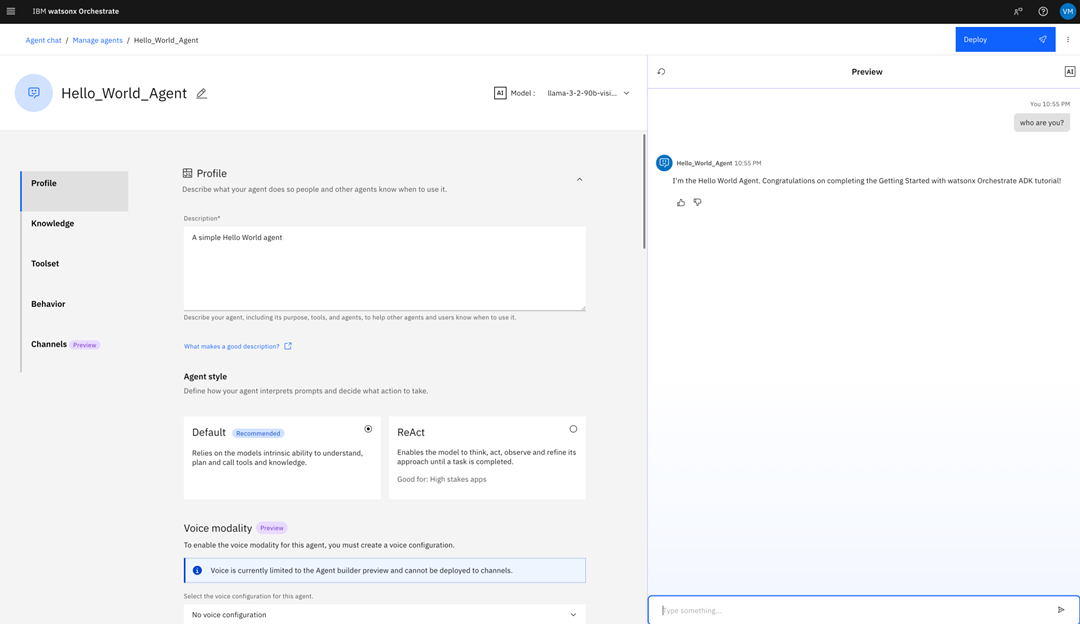
What’s next?
You have now created your first agent with the ADK and successfully imported it into your watsonx Orchestrate instance. To extend your agent’s behavior, you can use tools, knowledge bases and agentic workflows. To connect to services, you must create Connections to safely store credentials and sensitive data. You can also change the agent’s large language model and style by changing the agent specification, and you can test and evaluate the agent with the Evaluation Framework. See the following cards to learn more about what you can do with the ADK:Agents
Learn more about what you can do with agents, how you can change your agent style and how to customize your agent’s large language model.
Environments
Learn how to change your watsonx Orchestrate environments to import your agents developed with the ADK.
Tools
Learn more about how to use tools to extend your agent’s capabilities and how to integrate with external services.
Connections
Learn more about how to safely store credentials and connect to external services.
Knowledge Base
Learn how to use knowledge bases to provide more accurate responses and improve your agent’s knowledge in specific situations.
Evaluation Framework
Assess your agent’s behavior by comparing simulated agent interactions with a predefined set of reference data.