Configuring native agents
Each native agent includes these components:Specifies the large language model (LLM) that powers the agent’s ability to understand and respond to queries. For more information, see Managing custom LLMs with the AI gateway.
Provides advanced configuration options for the Large Language Model (LLM) used by the agent.
These settings allow you to control decoding behavior, output format, safety parameters,
model‑specific behavior, and provider‑specific extensions. If omitted, defaults from the AI gateway
or model provider are used.
Supported values
Supported values
Overrides the model ID for this agent. If not provided, the value from the top‑level
llm field is used.Specifies the decoding strategy (for example,
greedy, sample, or provider‑specific methods).Adds a custom prompt or prompt sequence to each model request.
Maximum number of tokens the model can generate.
Alternative output token limit used by some providers.
Controls randomness. Higher values increase creativity; lower values produce more deterministic output.
Uses nucleus sampling to restrict generation to tokens within a cumulative probability threshold.
Number of completion candidates to generate.
Enables streaming responses when supported by the model provider.
Returns log probabilities for top tokens.
Provides detailed log probability information for generated tokens.
When set to
true, the model returns both the prompt and the completion.One or more stop sequences that end the model’s output.
Penalizes repeated subject matter to encourage exploration of new topics.
Reduces repeated words or phrases by penalizing frequent tokens.
Generates multiple completions and returns the best scoring result.
Adjusts model probability distributions for specific tokens.
Identifier associated with the end user for logging or safety purposes.
Additional context sent to the model for each request.
Few-shot examples demonstrating the desired input-output behavior.
Restricts sampling to the
k most probable next tokens.Defines the required structure of the model output (for example, JSON schema mode).
Ensures repeatable outputs when supported.
Indicates whether requests or responses are stored by the model provider.
Custom metadata passed to the model provider.
Modalities supported for the request (for example,
text, audio, vision).Configuration for generating or processing audio.
Specifies the service tier or quality level for supported providers.
Prediction parameters used by specific model providers.
Safety configuration for providers such as Google’s Gemini Enterprise AI.
Anthropic‑specific beta feature settings.
Overrides the Anthropic model version.
Configures advanced reasoning or chain-of-thought features for supported models.
watsonx.ai space associated with the model execution.
watsonx.ai project bound to the request.
Controls reasoning depth for models that support variable reasoning levels.
Enables the model to call multiple tools in parallel.
Disables schema validation for tool calls (specific for Groq models).
Defines the prompting structure the agent uses. This structure determines how the LLM interprets and responds to instructions. For more information, see Choosing the agent style.
Defines whether the agent’s reasoning appears to the end user. When set to
True, the agent hides its reasoning from the user. When set to False, the agent displays its reasoning. The default value is False.Enables the agent to retain conversation history and context across multiple interactions within a session. When set to
True, the agent can recall information from previous messages in the conversation to provide more contextual and personalized responses. When set to False, each interaction is treated independently. The default value is False.Provides natural language guidance to the LLM. These instructions shape the agent’s behavior, such as adopting a specific persona like a customer service representative and explaining how to use tools and collaborators. For more information, see Writing instructions for agents.
Extends the LLM’s capabilities by enabling access to external functions and services. Examples include:
- OpenAPI definitions for external APIs
- Python functions for scripting more complex interactions with external systems
- Agentic workflows for orchestrating operations across tools and agents
- Toolkit-exposed tools such as an MCP server
Lists other agents this agent interacts with to solve complex problems. Collaborators can include native watsonx Orchestrate agents, external agents, or watsonx Assistants. For more information, see Connect to external agents.
Provides a human-readable summary of the agent’s purpose, visible in the Manage Agents UI. It also helps other agents understand its role when used as a collaborator. The description does not affect responses unless invoked as a collaborator. For more information, see Writing descriptions for agents.
Represents domain-specific knowledge that is acquired by the LLM from uploaded files or connected vector data stores. Agent Knowledge allows you to provide information that the agent should inherently know and use to answer questions. This knowledge can come from documents you upload or from various data sources integrated with watsonx Orchestrate, such as Milvus, Elasticsearch, AstraDB, and others.
To learn more about setting up a knowledge base see the section on Knowledge bases.
Specifies whether the Agent remains editable after import. This field accepts one of the following options:
editableSets the Agent as editable. This is the default value.non_editableSets the Agent as non-editable and prevents it from being exported.
An SVG-format string of an icon for the agent. The icon is used in the UI and in channels where the agent is connected to. It must follow these restrictions:
- SVG format
- Square shape
- Width and height between 64 and 100
- Maximum file size: 200 KB
Controls whether you can schedule the agent to run at specific times or intervals. When set to
True, scheduling is enabled and you can create schedules for this agent through Chat UI. When set to False, scheduling is disabled. The default value is None (scheduling disabled).Additional features of native agents
Customize your agent with extra features to match your needs.Guidelines
Use guidelines to control agent behavior. Guidelines create predictable, rule-based responses. Apply them when you need consistent actions.-
Define guidelines using the following format:
When
conditionthenperform an actionand/orinvoke a tool. - Include only guidelines relevant to the current user request in the agent prompt. This reduces complexity for the LLM.
- Configure the guidelines in priority order. Guidelines execute it, based on their position in the list.
A list of guidelines the agent should follow. Each guideline uses the format:
- When
conditionthenperform an actionand/orinvoke a tool. Provide at least one of action or tool.
Web chat configuration
Adjust web chat settings to control how your agent behaves in the web chat UI. Set up a welcome message and starter prompts to guide users from the start.Welcome message
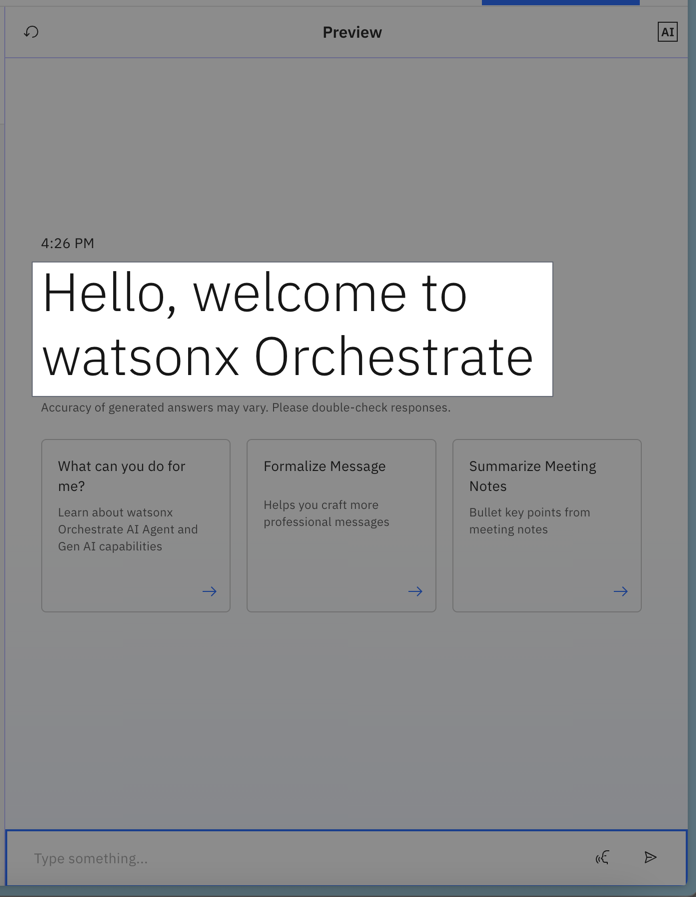
welcome_content schema in your agent file:
Configures the welcome content.
Starter prompts
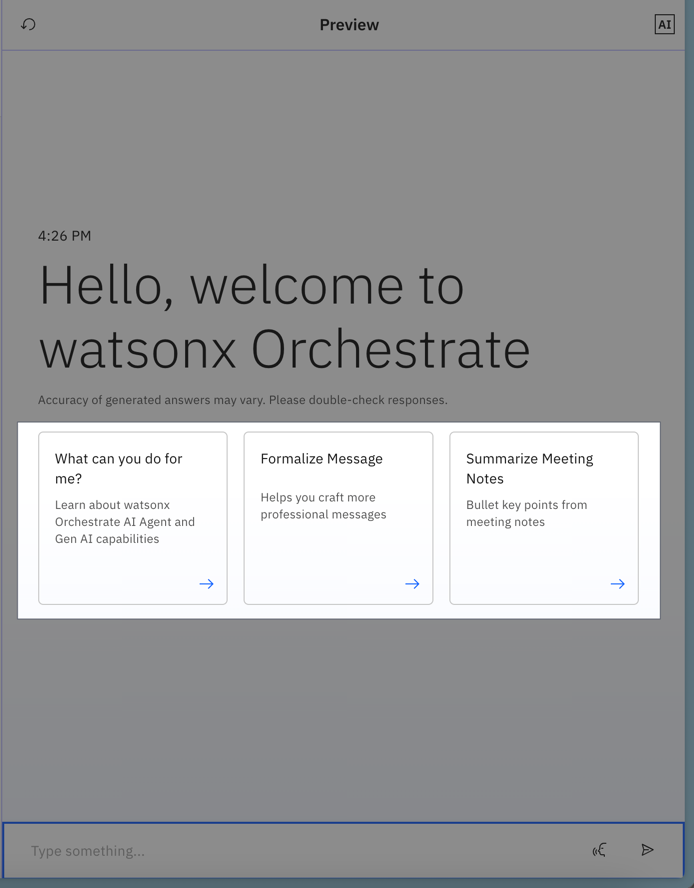
starter_prompts section of your agent file.
First, define whether these prompts are the default set. Then, for each prompt, specify these details:
Configures starter prompts shown to the user.
Chat with documents
Enable Chat with Documents to let users upload a document during a conversation and ask questions about its content. The document is available only within that session and is temporarily stored to support the interaction.Configures the Chat with Documents feature.
Providing access to context variables
Use context variables to inject user-specific identifiers—such as username, user ID, or tenant ID—from upstream systems into your agent. This creates personalized, context-aware interactions during execution. Your agent includes these variables by default:wxo_email_id- The email address of the user who invoked the agent or toolwxo_user_name- The username of the user who invoked the agent or toolwxo_tenant_id- The unique tenant ID for the requestwxo_thread_id- A unique identifier for a complete conversation session (chat thread) that groups all related messages.wxo_run_id- A unique identifier for each individual run within a thread, generated for every message to track each interaction step.
Naming convention for context variables:This list outlines standard rules for naming context variables to ensure clarity, consistency, and maintainability.
- Do not use the
wxo_prefix in your custom context variable names. This prefix is reserved for system variables. Use different naming conventions for custom variables to avoid conflicts. - Do not use hyphens (-) because they can cause errors. Use underscores (_) instead.
- The values for context variables available on the JSON Web Token (JWT) takes precedence over the
/runsAPI values and they cannot be modified.
Specifies if the agent can access context variables set by the Runs API.
Lists the context variables the agent can access.
Note:For scheduled workflows, the email address and username belong to the user who scheduled the workflow.
context_variables when you use these endpoints:
By default, agents invoked during a run cannot access context variables. To enable access, set context_access_enabled to true.
After enabling access, specify the context_variables your agent uses. These variables define which contextual details—such as user identifiers or session data—are available during execution.
You can reference these variables in descriptions, guidelines, or instructions by using curly braces like {my_context_variable}. You can also pass them as arguments to a Python function. When you pass them to a function, the agent runtime fills the values automatically without asking the user.
Conversation compaction settings
Configure conversation compaction to prevent context overflow in long conversations or when tools return large amounts of data. This feature maintains optimal performance by intelligently managing conversation history through a multi-level compaction strategy and specialized large message handling.Configure conversation compaction to prevent context overflow.
Compaction Architecture
Context compaction uses a three-level strategy to manage conversation history: Level 1 Compaction (Async): When conversation history exceedscontext_compaction_threshold, the system summarizes conversation segments into CompactedMessages automatically. This runs asynchronously as a background job without blocking the agent loop.
Level 2 Compaction (Async):
As multiple Level 1 summaries accumulate, the system combines them into a single Level 2 summary. This provides a higher-level overview of the conversation while maintaining recent context.
Level 3 - Sliding Window (Fallback):
For extremely long conversations, the compaction_sliding_window setting keeps only the N most recent compacted messages, preventing unbounded growth.
Processing Characteristics:
Asynchronous Operations
Asynchronous Operations
Level 1 and Level 2 compaction run as background jobs without blocking the agent loop:
- Compaction is triggered when thresholds are exceeded
- Summarization happens asynchronously
- Agent continues processing while compaction runs
- No impact on response latency
- Ideal for maintaining conversation flow
Synchronous Operations
Synchronous Operations
Large message handling processes messages inline before adding to conversation history:
- Triggered when individual messages exceed
large_message_threshold - Processes message synchronously (blocks until complete)
- Reduces token size before message enters conversation
- Prevents large messages from overwhelming context
- Essential for tools returning extensive data
Large Message Handling
In addition to conversation-level compaction, the system handles individual large messages such as extensive tool outputs through synchronous processing that reduces token size inline before adding to conversation history. The system uses different strategies based on content type:Unstructured Data
Unstructured Data
Strategy: Map-Reduce SummarizationProcess:
- Split content into chunks (
large_message_chunk_size) - Summarize each chunk in parallel
- Combine summaries into final result
- Long conversation logs
- Extensive documentation
- Verbose tool outputs
- Error messages and stack traces
large_message_thresholdlarge_message_chunk_size
Structured Data
Structured Data
Strategy: TruncationProcess:
- Detect structured format (JSON, XML, CSV, YAML)
- Truncate to preserve data integrity
- Add truncation notice
- Large JSON API responses
- Database query results
- XML configuration files
- CSV data exports
large_message_thresholdlarge_message_target_summarylarge_message_detect_structured
Configuration Examples
- Level 1 & 2 Only
- Level 1, 2 & 3
- With Large Message Handling
- Full Example
Basic compaction for most use cases. Enable Level 1 and Level 2 compaction without sliding window fallback.
Best practices for conversation compaction
- Enable for long conversations: Activate compaction for agents handling extended interactions or processing large tool outputs
-
Match LLM context window:
Set
context_compaction_thresholdbelow your LLM’s maximum context window. For example, use 20K for models with 32K context. -
Use sliding window for extreme cases:
Enable
compaction_sliding_window(Level 3) only for conversations that may run indefinitely -
Preserve structured data:
Keep
large_message_detect_structuredenabled by default to maintain data integrity in JSON, XML, and other structured formats -
Tune for your use case:
- Lower thresholds = more frequent compaction, better for memory-constrained scenarios
- Higher thresholds = less frequent compaction, better for context-rich conversations
- Monitor performance: Track compaction frequency and adjust thresholds based on actual usage patterns
- Consider tool outputs: If your tools return large datasets, configure large message handling appropriately