.env file.
Installation prerequisites
Before installing watsonx Orchestrate Developer Edition, make sure you meet the following requirements:Hardware requirements
Hardware requirements
Your computer needs to meet the following requirements:
When running
| Component | Minimum | Recommended |
|---|---|---|
| CPU | 8-core | 8-core |
| RAM | 16 GB | 32 GB |
--with-doc-processing| Component | Minimum | Recommended |
|---|---|---|
| CPU | 8-core | 8-core |
| RAM | 24 GB | 32 GB |
LLM Inference Provider
LLM Inference Provider
You must have access to at least one of the following services:
- watsonx Orchestrate on SaaS
- watsonx.ai
- Groq
- A custom llm provider provisioned through the AI Gateway
watsonx Orchestrate Developer Edition license
watsonx Orchestrate Developer Edition license
You need a valid license for watsonx Orchestrate Developer Edition. You can obtain a license by:
- Purchasing a SaaS license for watsonx Orchestrate on either IBM Cloud or AWS
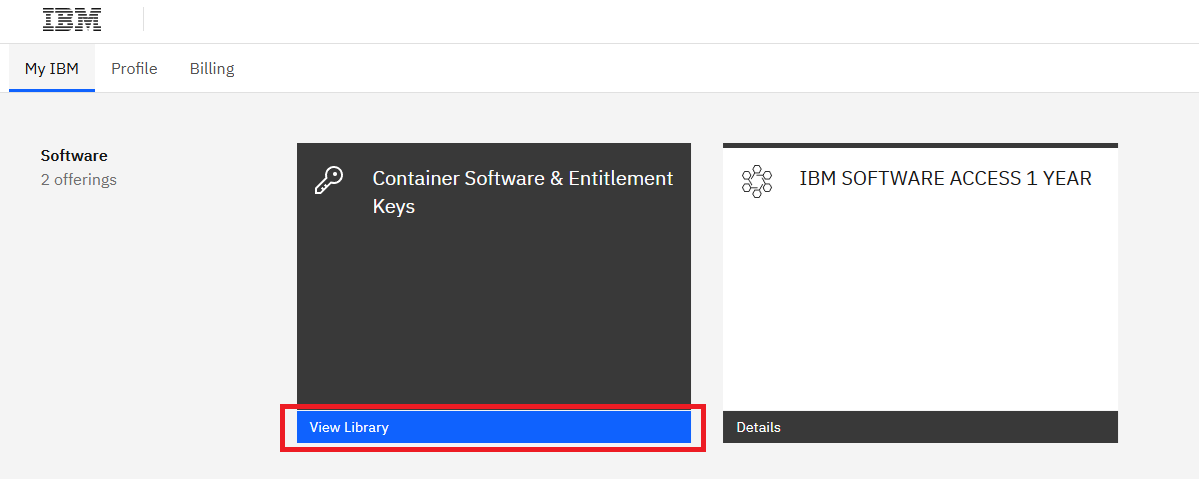
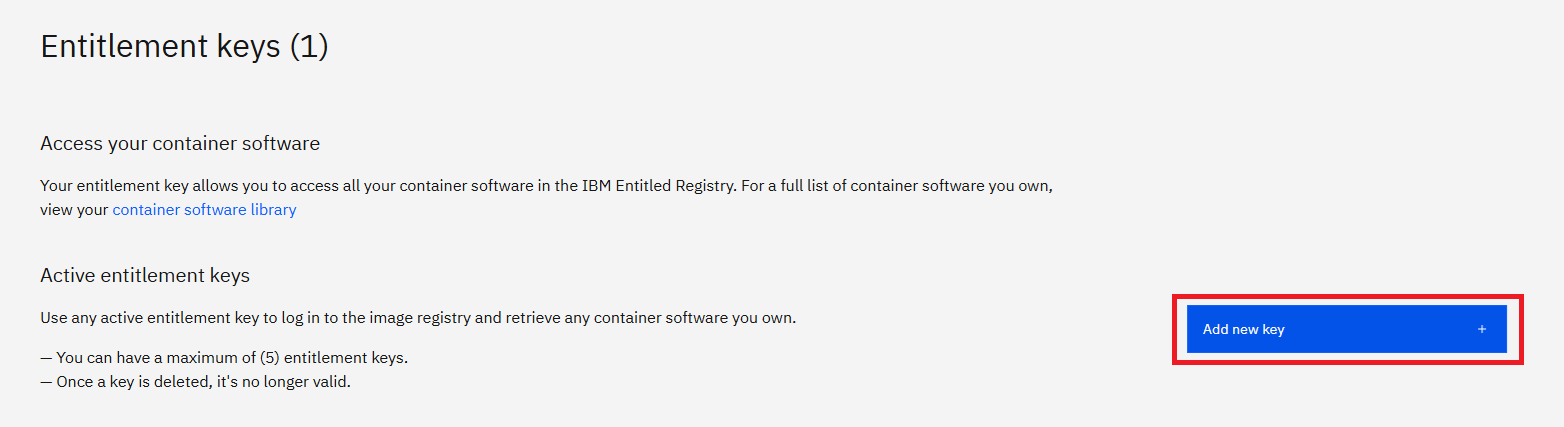
- Purchasing an On-premises license for watsonx Orchestrate. The myIBM option uses your entitlement key to watsonx Orchestrate.
- Contacting IBM Sales for a direct purchase
Configuring .env file
The.env file is a plain text file that stores environment variables. The ADK uses the variables you define in this file to authenticate your user and install watsonx Orchestrate Developer Edition.
The variables you need to configure depend on the authentication method you choose. You can authenticate using one of the following methods:
- watsonx Orchestrate account Use this method if you have a watsonx Orchestrate account or if you’re using a 30-day trial.
- myIBM Use this method if you purchased a watsonx Orchestrate Developer Edition license through sales or if you’re using an on-premises version.
- Custom Image Registry Use this method if you’ve already copied the required Docker images to an image registry. For example, an Artifactory repository.
.env file based on your authentication method.
- watsonx Orchestrate account
- myIBM
- Custom Image Registry
To authenticate using a watsonx Orchestrate account:
Configure watsonx Orchestrate instance variables in the .env file
Add the following variables to your
.env file:WO_DEVELOPER_EDITION_SOURCE
The source ID for the watsonx Orchestrate Developer Edition. Set
orchestrate.WO_INSTANCE
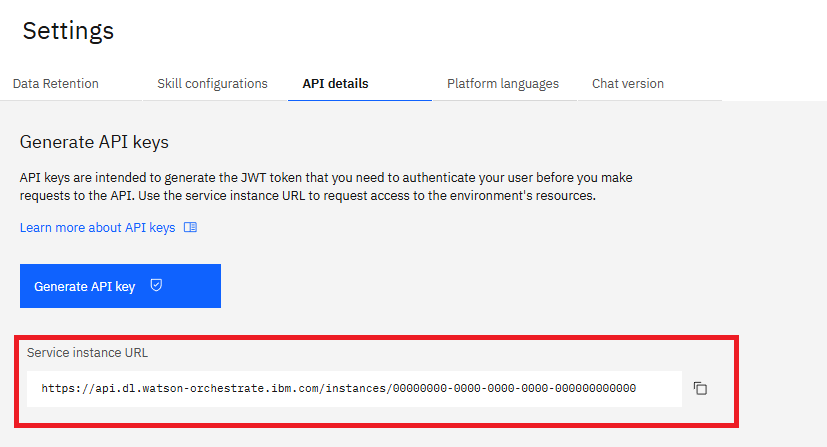
The watsonx Orchestrate service instance URL.
Show more details
Show more details
To obtain the service instance URL, follow these steps:
- Log in to your watsonx Orchestrate account.
-
Click your user profile and open the Settings page.
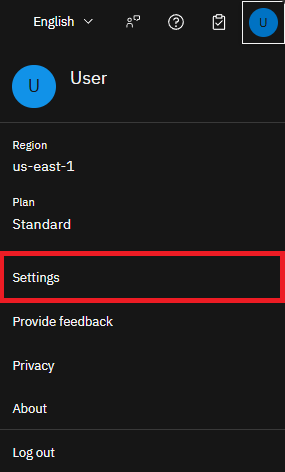
- Open the API details tab.
-
Copy your service instance URL.
WO_API_KEY
The watsonx Orchestrate API key.
Show more details
Show more details
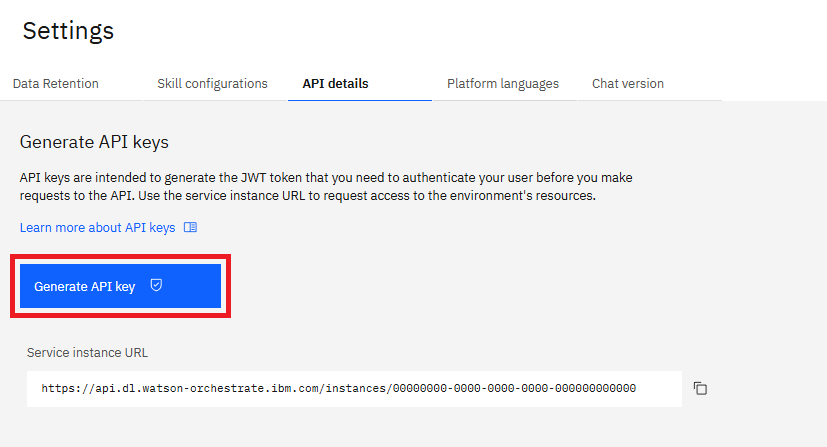
To obtain the API key, follow these steps:
- Log in to your watsonx Orchestrate account.
-
Click your user profile and open the Settings page.
- Open the API details tab.
-
Click Generate API key.
.env Example
Configure services credentials for watsonx Orchestrate Developer Edition in the .env file
watsonx Orchestrate Developer Edition uses several services. You configure their credentials manually in the
.env file.Note:If you already configured service credentials, setting these variables replaces your previous credentials when you start the server.
MINIO_ROOT_USER
The root user for the Minio object storage service.
LANGFUSE_USERNAME
The username for the Langfuse service used for observability and tracing.
MCP_GATEWAY_BASIC_USER
The basic authentication username for the MCP Gateway service.
CLICKHOUSE_USER
The username for the ClickHouse analytical database service.
POSTGRES_PASSWORD
The password for the PostgreSQL database used by the platform.
MINIO_ROOT_PASSWORD
The root password for the Minio object storage service.
LANGFUSE_PASSWORD
The password for the Langfuse service.
MCP_GATEWAY_BASIC_PASSWORD
The basic authentication password for the MCP Gateway service.
MCP_GATEWAY_ADMIN_PASSWORD
The administrator password for the MCP Gateway service.
CLICKHOUSE_PASSWORD
The password for the ClickHouse analytical database service.
ES_PASSWORD
The password for the Elasticsearch or OpenSearch service used for indexing and search.
MILVUS_PASSWORD
The password for the Milvus vector database service.
DB_ENCRYPTION_KEY
The encryption key you use to secure sensitive database fields.
.env Example
For on-premises: Configure on-premises variables in the .env file
If you’re using an on-premises setup, you also need to set the following environment variables:
DOCKER_IMAGE_PULL_LAYERS_PARALLELISM
Boolean environment variable that controls whether image layers are pulled in parallel. Defaults to
true.Treated as false if DOCKER_IMAGE_PULL_PARALLEL_WORKERS_COUNT is set to 1.DOCKER_IMAGE_PULL_PARALLEL_WORKERS_COUNT
Integer value that defines how many Docker image layers are pulled in parallel. Accepts values from
1 to 10.Values outside this range trigger a fallback to the default value. Defaults to 7.USE_RANGE_REQUESTS_IN_DOCKER_IMAGE_PULLS
Boolean environment variable that enables ranged requests when pulling large layers. Defaults to
true.Note:Only takes effect when
DOCKER_IMAGE_PULL_LAYERS_PARALLELISM is enabled.WO_VERIFY_SSL
ADK uses SSL authentication by default to connect to a registry proxy in your watsonx Orchestrate on-premises environment. Use this variable to enable or disable SSL authentication. Possible values:
True: To enable SSL security using the system’s default SSL certificate.False: To disable SSL authentication.- SSL file path: To use a custom SSL certificate.
IGNORE_DOCKER_LAYER_CACHING
Boolean environment variable that determines whether CPD Docker image layers are cached in the local orchestrate cache during pulls. Defaults to
false..env Example
For regions other than us-south: Configure region variables in the .env file
Additionally, if you operate in a region other than us-south, configure the region variables. Set the following variables:
ASSISTANT_LLM_API_BASE
The assistant LMM API endpoint for your region
ASSISTANT_EMBEDDINGS_API_BASE
The assistant embedding API endpoint for your region.
ROUTING_LLM_API_BASE
The routing LLM API endpoint for your region.
WATSONX_URL
The watsonx endpoint for your region.
.env Example
Installing watsonx Orchestrate Developer Edition
Once you have configured the environment variables in your.env file, install the watsonx Orchestrate server by running:
BASH
By default, the following features are disabled:
- Agent Knowledge - Upload files
- Agentic Workflow - Document Processing
- Provide WO_INSTANCE and WO_API_KEY in your
.envfile. For more information, see Configuring .env file using watsonx Orchestrate account. - Run the
orchestrate server start -e <path-.env-file> --with-doc-processingcommand. This command starts the server with document processing enabled. Make sure you allocate at least 24 GB of memory to your server for stable operation.
- OpenAPI Docs:
http://localhost:4321/docs. This API documentation is also available in the watsonx Orchestrate Developer Edition APIs. - API Base URL:
http://localhost:4321/api
Note:
Installing watsonx Orchestrate Developer Edition starts only the server, not the UI. To start the UI, run
orchestrate chat start. For more information, see Starting watsonx Orchestrate Developer Edition UI.Uninstalling watsonx Orchestrate Developer Edition
If you no longer want to use watsonx Orchestrate Developer Edition, remove it and all its data from your computer. To do this, run:BASH
What’s Next?
After installing watsonx Orchestrate Developer Edition, you can use it as a local server with theorchestrate env activate local command.
You can also start the watsonx Orchestrate UI. In addition, you can manage watsonx Orchestrate Developer Edition with the ADK CLI. For more information, see Managing Developer Edition.