> ## Documentation Index
> Fetch the complete documentation index at: https://developer.watson-orchestrate.ibm.com/llms.txt
> Use this file to discover all available pages before exploring further.
# VS Code environment switcher
The environment switcher in the VS Code extension provides an easy way to manage and switch between environments that are used with Orchestrate. Environments represent clusters or servers where Orchestrate is available. In SaaS deployments, an environment corresponds to an instance that runs in AWS or IBM Cloud. For on-premises setups, an environment refers to a CPD cluster. These options represent the full range of environments that you can select.
The extension removes the need to memorize ADK commands for creating or activating environments. Instead, you can add or change environments through a dropdown in the editor. When you select a new environment, all ADK commands automatically point to that environment. All operations align with the active environment.
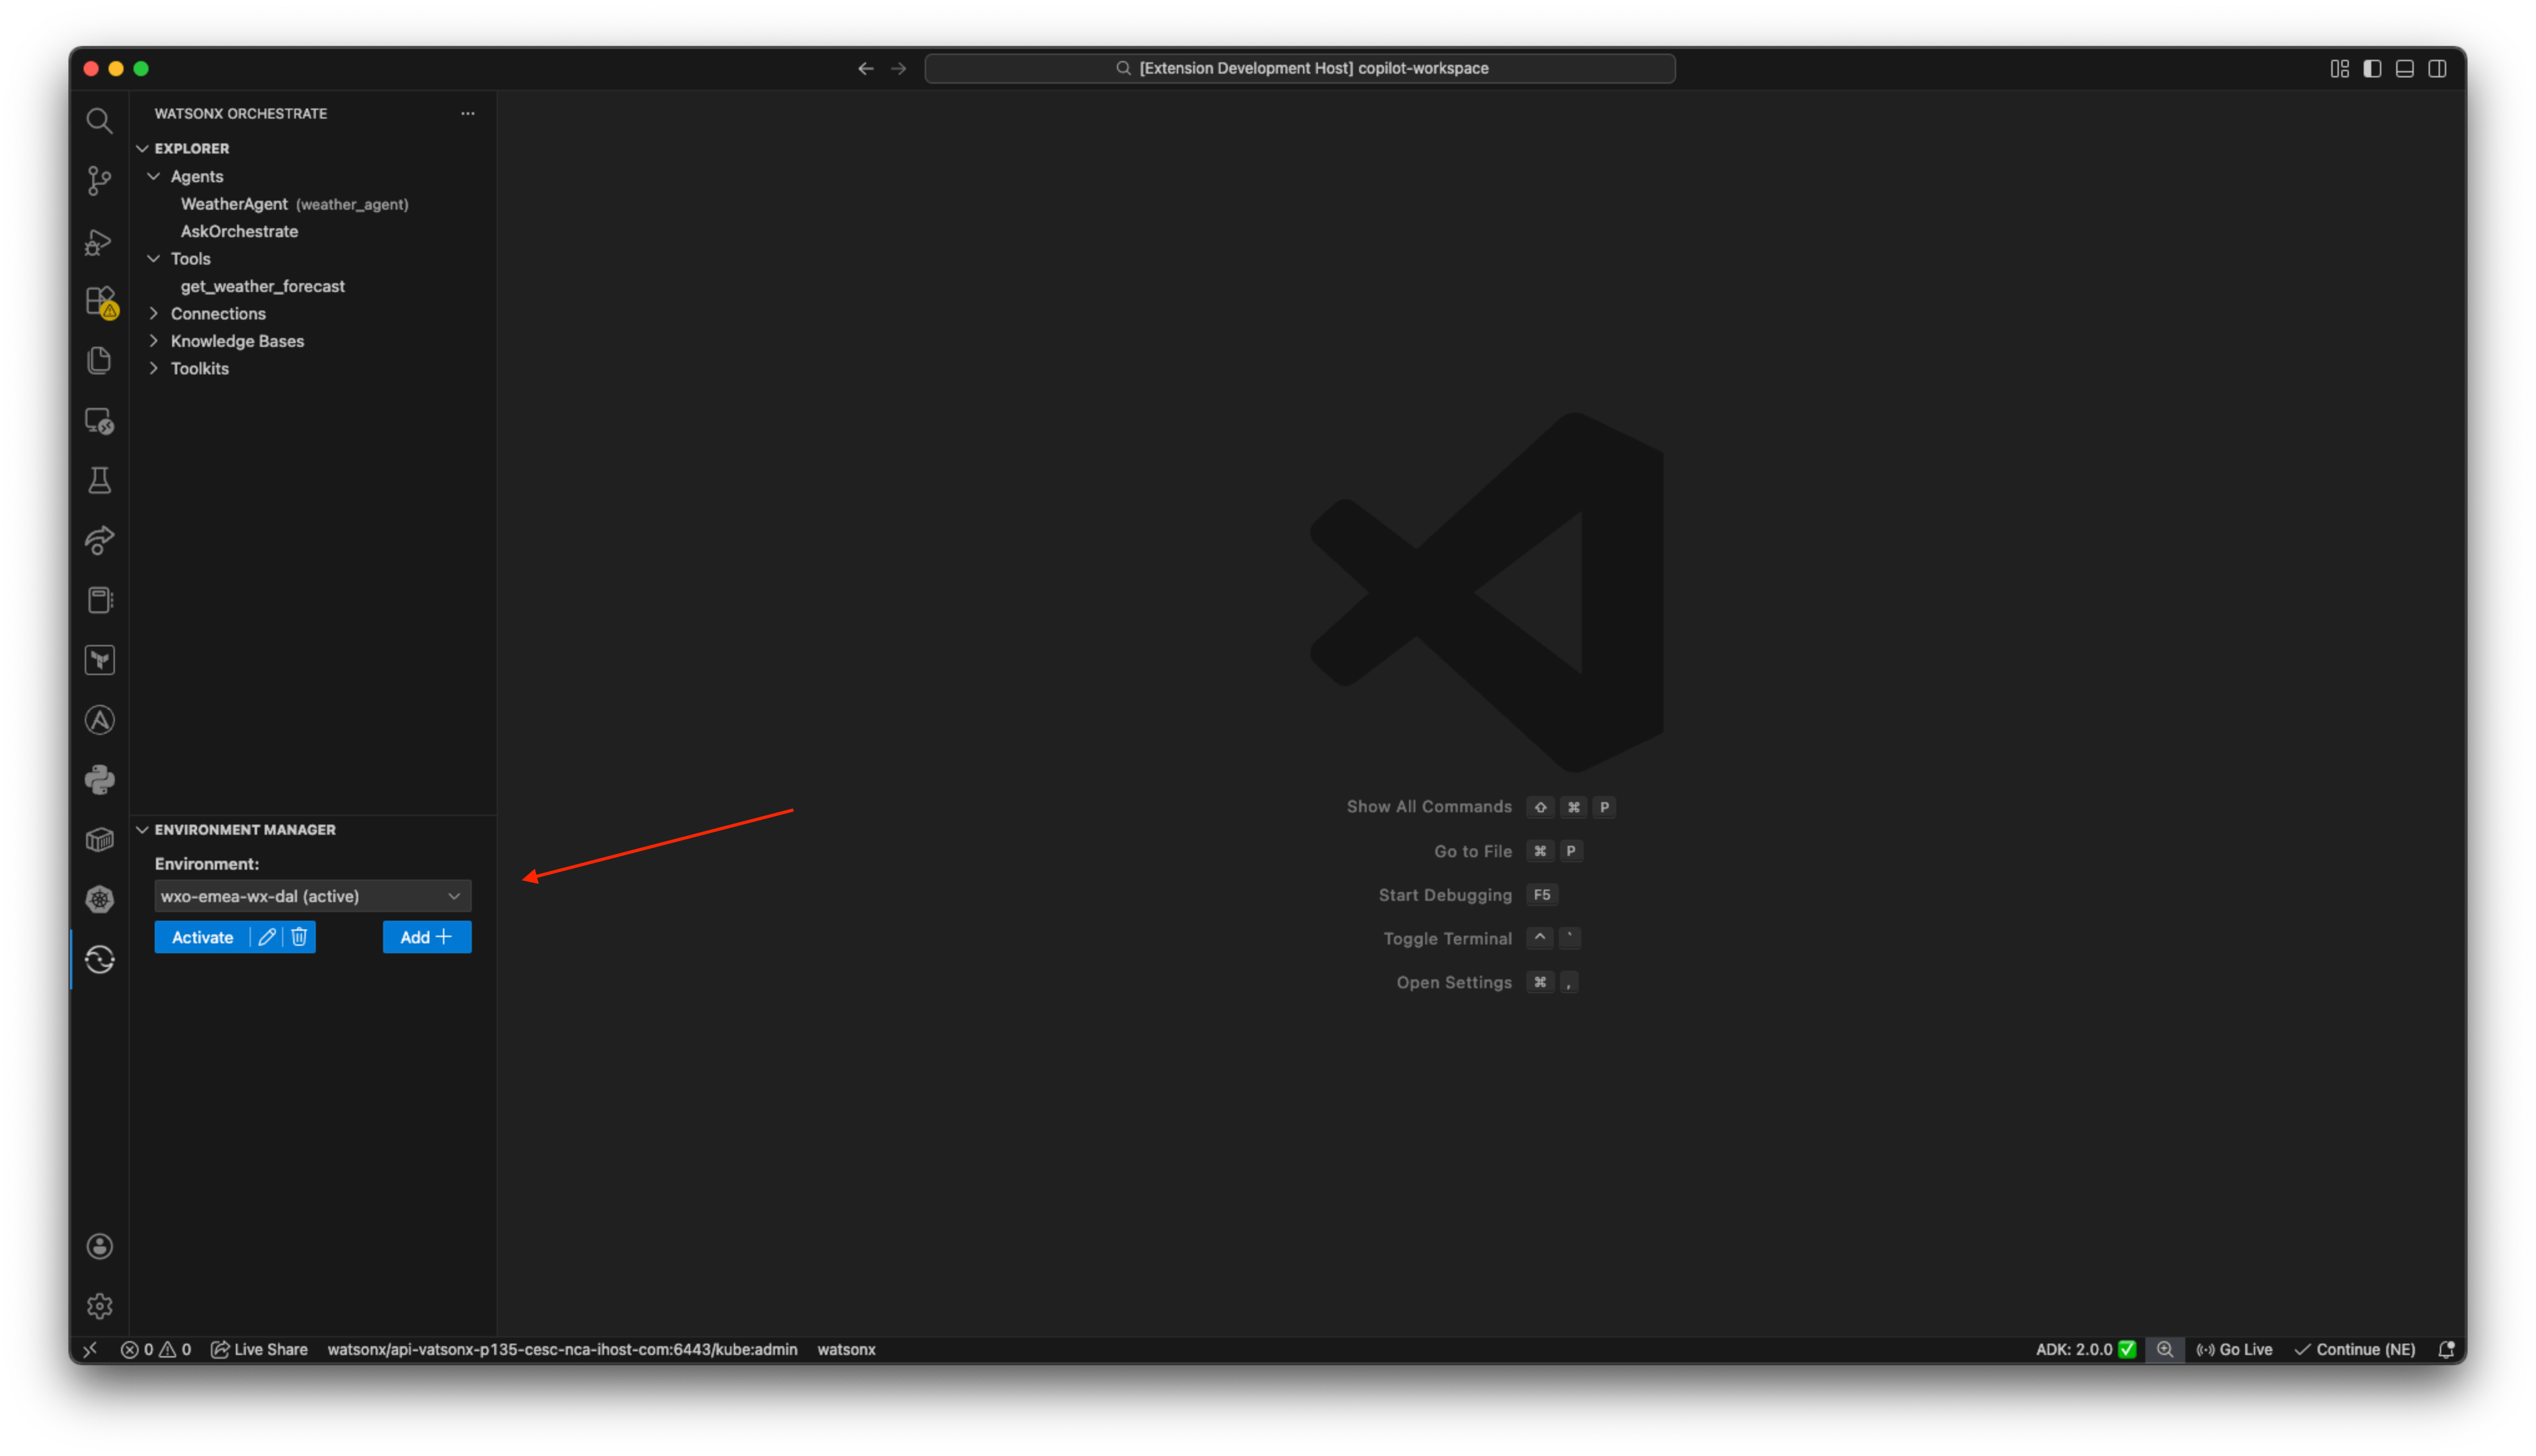 The extension also provides direct access to an agent’s web chat. You can start an agent and interact with it immediately, which makes it possible to test recognition, behavior, and responses in real time without exiting the editor. For more information, see [Web chat embed](./webchat_embed).
## Add an Orchestrate instance
## Prerequisites
To setup the enviroment switcher, you must have the following prerequisites:
* You must install the Orchestrate copilot VS Code extension. For more information, see [Installing Orchestrate copilot VS Code extension](./installing_adk_extension)
- In VS Code, click the **Orchestrate** icon
The extension also provides direct access to an agent’s web chat. You can start an agent and interact with it immediately, which makes it possible to test recognition, behavior, and responses in real time without exiting the editor. For more information, see [Web chat embed](./webchat_embed).
## Add an Orchestrate instance
## Prerequisites
To setup the enviroment switcher, you must have the following prerequisites:
* You must install the Orchestrate copilot VS Code extension. For more information, see [Installing Orchestrate copilot VS Code extension](./installing_adk_extension)
- In VS Code, click the **Orchestrate** icon  on the left menu bar.
- Click **Add +**.
- In **Name**, type the name of the instance.
- In **URL**, paste the `WO_INSTANCE`.
- Click **Submit**.
- In the **Environment** drop-down, select your instance.
- Copy the `WO_API_KEY`.
- Click **Activate**.
- Paste the `WO_API_KEY` in the top search bar and press **Enter**.
- Your embedded web chat is now active.
* Go to **Explorer** > **Agents**.
* Click **AskOrchestrate**.
* The definition of your agent downloads as a .yaml file.
* Press **Command + Shift + P** (Mac) or **Control + Shift + P** (Windows).
* Type **Chat** in the top search bar.
* Select **watsonx Orchestrate: Chat with Current Agent File**.
* A warning message appears, click **Yes**.
### Activating your local environment
* You must configure the .env file procedure. For more information, see [Configuring .env file](../developer_edition/wxOde_setup_legacy#configuring-env-file).
* You must create the .env file of your VS Code project. For more information, see [Add an Orchestrate instance](#add-an-orchestrate-instance).
1. Click your local environment in the Environment switcher.
2. Click Activate.
3. Click Start server.
on the left menu bar.
- Click **Add +**.
- In **Name**, type the name of the instance.
- In **URL**, paste the `WO_INSTANCE`.
- Click **Submit**.
- In the **Environment** drop-down, select your instance.
- Copy the `WO_API_KEY`.
- Click **Activate**.
- Paste the `WO_API_KEY` in the top search bar and press **Enter**.
- Your embedded web chat is now active.
* Go to **Explorer** > **Agents**.
* Click **AskOrchestrate**.
* The definition of your agent downloads as a .yaml file.
* Press **Command + Shift + P** (Mac) or **Control + Shift + P** (Windows).
* Type **Chat** in the top search bar.
* Select **watsonx Orchestrate: Chat with Current Agent File**.
* A warning message appears, click **Yes**.
### Activating your local environment
* You must configure the .env file procedure. For more information, see [Configuring .env file](../developer_edition/wxOde_setup_legacy#configuring-env-file).
* You must create the .env file of your VS Code project. For more information, see [Add an Orchestrate instance](#add-an-orchestrate-instance).
1. Click your local environment in the Environment switcher.
2. Click Activate.
3. Click Start server.