> ## Documentation Index
> Fetch the complete documentation index at: https://developer.watson-orchestrate.ibm.com/llms.txt
> Use this file to discover all available pages before exploring further.
# Creating an evaluation dataset
There are two primary methods for generating an evaluation dataset to evaluate your agents:
* [**Using the `record` command**](#recording-user-interaction)\
Captures live chat sessions via the chat UI and converts them into structured datasets. Useful for benchmarking agent behavior across different configurations (e.g., agent descriptions, LLMs).
* [**Using the `generate` command**](#generating-user-data)\
Automatically creates ground truth datasets from user stories and tool definitions. Ideal for building realistic and repeatable evaluation scenarios.
## Recording user interaction
The `record` command captures real-time chat interactions and automatically generates evaluation datasets from them.
With recording enabled, any conversation you have in the chat UI will automatically be captured and annotated for evaluation.
You can create as many sessions as needed. Each session's data will be stored in separate annotated files.
**Tip:**\
Create a new chat session when you want to make new datasets. Using the same chat session for multiple tests can cause issues with the final output.
**Note:**
When you work with external agents that act as collaborators of native agents, use the `record` command the same way you do with native agents. The key difference is that the generated ground truth data doesn't include a graph of tool calls in the `"goals"` and `"goal_details"` sections.
```json JSON theme={null}
{
"agent": "NATIVE_AGENT_NAME",
"goals": {
"summarize": [
]
},
"goal_details": [
{
"name": "summarize",
"type": "text",
"response": "FINAL RESPONSE MESSAGE",
"keywords": [
"KEYWORD_1",
"KEYWORD_2",
"..."
]
}
],
"story": "STORY OF THE INTERACTION",
"starting_sentence": "STARTING SENTENCE USED TO START THE INTERACTION"
}
```
### Workflow
1. Interact with the agent via the chat UI.
2. Use the `record` command to capture the session.
3. The session is converted into a structured dataset for evaluation.
## Prerequisites
You must activate an environment before you record your data.
For more information about how to add an environment, see [Configure access to remote environments](../environment/initiate_environment).
```bash theme={null}
orchestrate env activate
```
Starting from version 1.12.0, this command now works with SaaS and on-premises offerings of watsonx Orchestrate. You can now run your evaluations in remote instances, instead of just using the watsonx Orchestrate Developer Edition.
Open the watsonx Orchestrate chat URL. For example:
```url AWS theme={null}
https://.watson-orchestrate.ibm.com/chat
```
```url IBM Cloud theme={null}
https://.watson-orchestrate.cloud.ibm.com/chat
```
```url On-premises theme={null}
# Only example URL, your on-premises environment can use a different format
https://:/orchestrate/chat
```
Make sure your chat UI is running. Use the following command to start the chat interface:
```bash theme={null}
orchestrate chat start
```
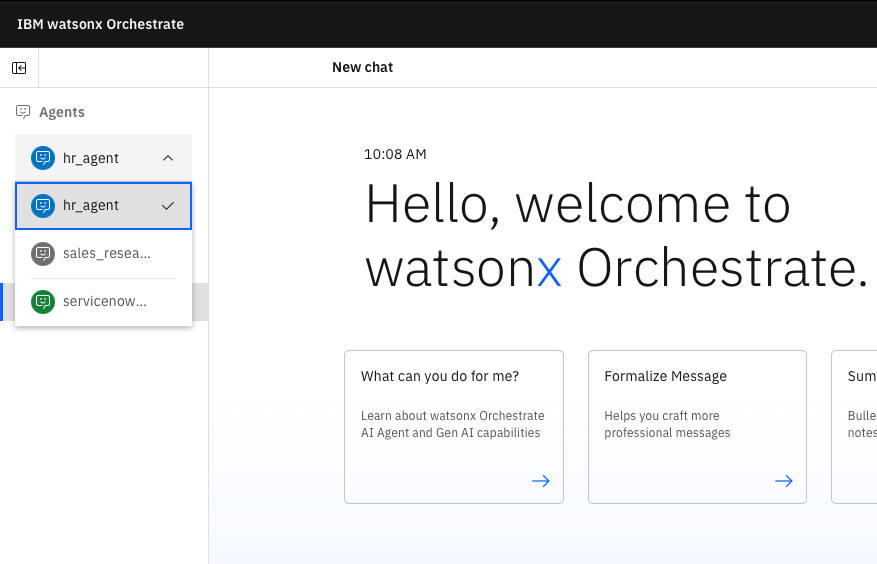
Once the UI is running, open your browser and navigate to:
[http://localhost:3000/chat-lite](http://localhost:3000/chat-lite)
Here, you can select the agent you wish to interact with. For example, the image below uses the `hr_agent` agent:
 ### Start recording your session
To begin recording, run the following command in your terminal:
```bash theme={null}
orchestrate evaluations record --output-dir ./chat_recordings
```
**Flags:**
* `--output-dir` (optional): Directory where your recorded data will be saved. If omitted, the data will be saved in your current working directory. For every chat session, the following file is generated in your output directory:
* `_annotated_data.json`
Annotated ground truth data based on your chat session, ready for evaluation.
## Example annotated data
The following is a sample conversation with the `hr_agent`:
### Start recording your session
To begin recording, run the following command in your terminal:
```bash theme={null}
orchestrate evaluations record --output-dir ./chat_recordings
```
**Flags:**
* `--output-dir` (optional): Directory where your recorded data will be saved. If omitted, the data will be saved in your current working directory. For every chat session, the following file is generated in your output directory:
* `_annotated_data.json`
Annotated ground truth data based on your chat session, ready for evaluation.
## Example annotated data
The following is a sample conversation with the `hr_agent`:
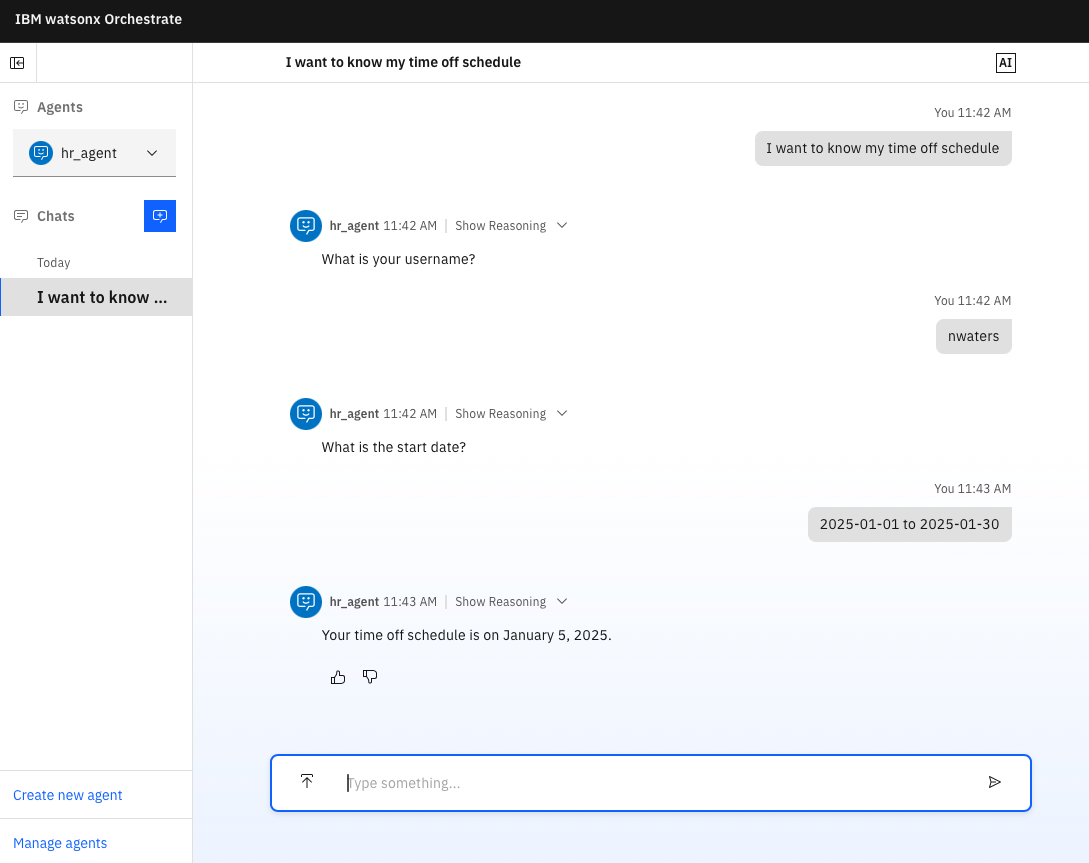 This conversation generates the following annotated data file:
```json theme={null}
{
"agent": "hr_agent",
"goals": {
"get_assignment_id_hr_agent-1": [
"get_timeoff_schedule_hr_agent-1"
],
"get_timeoff_schedule_hr_agent-1": [
"summarize"
]
},
"goal_details": [
{
"type": "tool_call",
"name": "get_assignment_id_hr_agent-1",
"tool_name": "get_assignment_id_hr_agent",
"args": {
"username": "nwaters"
}
},
{
"type": "tool_call",
"name": "get_timeoff_schedule_hr_agent-1",
"tool_name": "get_timeoff_schedule_hr_agent",
"args": {
"assignment_id": "15778303",
"end_date": "2025-01-30",
"start_date": "2025-01-01"
}
},
{
"name": "summarize",
"type": "text",
"response": "Your time off schedule is on January 5, 2025.",
"keywords": [
"January 5, 2025"
]
}
],
"story": "You want to know your time off schedule. Your username is nwaters. The start date is 2025-01-01. The end date is 2025-01-30.",
"starting_sentence": "I want to know my time off schedule"
}
```
**Note:**
* The annotated data is generated automatically. Therefore, it is essential to review and, if necessary, edit the data before using it for evaluation purposes. You can also delete any details that are not relevant to your tests.
* The `starting_sentence` field is populated directly from your inputs. However, other fields like `story` and `goals` are derived from the recorded conversation and might require validation to ensure their accuracy and relevance.
### Stopping the recording
When you are done with your session, **press `Ctrl+C`** in the terminal running the `record` command. Be sure to finish your conversation before stopping to avoid generating an incomplete dataset.
## Generating user data
The `generate` command transforms user stories into structured test cases using your tool definitions. It produces datasets suitable for automated evaluation and benchmarking of agents.
**Note:**
For now, you can use only Python tools.
### Key Features
* Converts user stories into structured test cases
* Generates valid tool call sequences based on your tool definitions
* Outputs datasets for consistent and automated agent evaluation
### Prerequisites
Before running the `generate` command, ensure the following:
1. **Tool Definitions**: Define tools in a Python module using the `@tool` decorator and proper type annotations.
2. **User Stories**: Prepare a `.csv` file containing user stories. Each row should include:
* `story`: A natural language description of the user's goal
* `agent`: The name of the agent responsible for handling the story
3. **Environment Setup**: Import your tool and agent definitions into the environment where the command will be executed. For more information, see [Importing Tools](../tools/deploy_tool).
### Example user stories
```csv theme={null}
story,agent
I want to look up holiday calendar for this year. My email-id is someone@gmail.com,hr_agent
```
You can find example of stories and tools in the following links:
* [examples/evaluations/generate/stories.csv](https://github.com/IBM/ibm-watsonx-orchestrate-adk/tree/main/examples/evaluations/generate/stories.csv)
* [examples/evaluations/generate/tools.py](https://github.com/IBM/ibm-watsonx-orchestrate-adk/tree/main/examples/evaluations/generate/tools.py)
### The `generate` command
You can run the following command to run the command:
```bash theme={null}
orchestrate evaluations generate --stories-path --tools-path
```
**Flags**:
* `--stories-path`: Path to your CSV file of user stories
* `--tools-path`: Path to your Python file defining agent tools
* `--output-dir` (optional): Output directory for generated files; if omitted, files are saved alongside your stories file.
The `generate` command will analyze each story and generate a sequence of tool calls which is saved as an `_snapshot_llm.json` file in our output directory.
The snapshot is then used to generate structured test cases that you can use for evaluating your agent(s). The generated datasets are written to a `_test_cases/` folder in the output directory.
### Tool requirements
Tool definitions must be provided in a Python file and must follow these requirements:
* Functions must be top-level (not inside classes)
* Each tool must use the `@tool` decorator
* Each tool must include a descriptive docstring
* Argu.ments must be typed (`str`, `int`, etc.)
* Return values must be JSON-serializable (`str`, `list`, `dict`, etc.)
**Example:**
```python theme={null}
@tool()
def fetch_assignment_id(username: str) -> str:
"""Returns the assignment ID for a given employee username.
Args:
username (str): The employee's username.
Returns:
str: The assignment ID as a string, or 'not found' if no assignment exists.
"""
assignment_ids = {
"nwaters": "15778303",
"johndoe": "15338303",
"nken": "15338304"
}
return assignment_ids.get(username, "not found")
```
**Note:**\
The tools provided in this example are mocked and use hardcoded data. If your tools need to make actual API calls, make sure to include the necessary authentication credentials (API keys, tokens, etc.) and proper error handling in your implementation.
**Tip:**
* Always verify that your API credentials are set before running `generate`.
* Generated datasets serve as ground truth for benchmarking and validating agent behavior.
This conversation generates the following annotated data file:
```json theme={null}
{
"agent": "hr_agent",
"goals": {
"get_assignment_id_hr_agent-1": [
"get_timeoff_schedule_hr_agent-1"
],
"get_timeoff_schedule_hr_agent-1": [
"summarize"
]
},
"goal_details": [
{
"type": "tool_call",
"name": "get_assignment_id_hr_agent-1",
"tool_name": "get_assignment_id_hr_agent",
"args": {
"username": "nwaters"
}
},
{
"type": "tool_call",
"name": "get_timeoff_schedule_hr_agent-1",
"tool_name": "get_timeoff_schedule_hr_agent",
"args": {
"assignment_id": "15778303",
"end_date": "2025-01-30",
"start_date": "2025-01-01"
}
},
{
"name": "summarize",
"type": "text",
"response": "Your time off schedule is on January 5, 2025.",
"keywords": [
"January 5, 2025"
]
}
],
"story": "You want to know your time off schedule. Your username is nwaters. The start date is 2025-01-01. The end date is 2025-01-30.",
"starting_sentence": "I want to know my time off schedule"
}
```
**Note:**
* The annotated data is generated automatically. Therefore, it is essential to review and, if necessary, edit the data before using it for evaluation purposes. You can also delete any details that are not relevant to your tests.
* The `starting_sentence` field is populated directly from your inputs. However, other fields like `story` and `goals` are derived from the recorded conversation and might require validation to ensure their accuracy and relevance.
### Stopping the recording
When you are done with your session, **press `Ctrl+C`** in the terminal running the `record` command. Be sure to finish your conversation before stopping to avoid generating an incomplete dataset.
## Generating user data
The `generate` command transforms user stories into structured test cases using your tool definitions. It produces datasets suitable for automated evaluation and benchmarking of agents.
**Note:**
For now, you can use only Python tools.
### Key Features
* Converts user stories into structured test cases
* Generates valid tool call sequences based on your tool definitions
* Outputs datasets for consistent and automated agent evaluation
### Prerequisites
Before running the `generate` command, ensure the following:
1. **Tool Definitions**: Define tools in a Python module using the `@tool` decorator and proper type annotations.
2. **User Stories**: Prepare a `.csv` file containing user stories. Each row should include:
* `story`: A natural language description of the user's goal
* `agent`: The name of the agent responsible for handling the story
3. **Environment Setup**: Import your tool and agent definitions into the environment where the command will be executed. For more information, see [Importing Tools](../tools/deploy_tool).
### Example user stories
```csv theme={null}
story,agent
I want to look up holiday calendar for this year. My email-id is someone@gmail.com,hr_agent
```
You can find example of stories and tools in the following links:
* [examples/evaluations/generate/stories.csv](https://github.com/IBM/ibm-watsonx-orchestrate-adk/tree/main/examples/evaluations/generate/stories.csv)
* [examples/evaluations/generate/tools.py](https://github.com/IBM/ibm-watsonx-orchestrate-adk/tree/main/examples/evaluations/generate/tools.py)
### The `generate` command
You can run the following command to run the command:
```bash theme={null}
orchestrate evaluations generate --stories-path --tools-path
```
**Flags**:
* `--stories-path`: Path to your CSV file of user stories
* `--tools-path`: Path to your Python file defining agent tools
* `--output-dir` (optional): Output directory for generated files; if omitted, files are saved alongside your stories file.
The `generate` command will analyze each story and generate a sequence of tool calls which is saved as an `_snapshot_llm.json` file in our output directory.
The snapshot is then used to generate structured test cases that you can use for evaluating your agent(s). The generated datasets are written to a `_test_cases/` folder in the output directory.
### Tool requirements
Tool definitions must be provided in a Python file and must follow these requirements:
* Functions must be top-level (not inside classes)
* Each tool must use the `@tool` decorator
* Each tool must include a descriptive docstring
* Argu.ments must be typed (`str`, `int`, etc.)
* Return values must be JSON-serializable (`str`, `list`, `dict`, etc.)
**Example:**
```python theme={null}
@tool()
def fetch_assignment_id(username: str) -> str:
"""Returns the assignment ID for a given employee username.
Args:
username (str): The employee's username.
Returns:
str: The assignment ID as a string, or 'not found' if no assignment exists.
"""
assignment_ids = {
"nwaters": "15778303",
"johndoe": "15338303",
"nken": "15338304"
}
return assignment_ids.get(username, "not found")
```
**Note:**\
The tools provided in this example are mocked and use hardcoded data. If your tools need to make actual API calls, make sure to include the necessary authentication credentials (API keys, tokens, etc.) and proper error handling in your implementation.
**Tip:**
* Always verify that your API credentials are set before running `generate`.
* Generated datasets serve as ground truth for benchmarking and validating agent behavior.